Saturday, December 11, 2021

Spoon Beetle SWAPS


 Spoon Beetle SWAPS


Materials: Air-dry clay or plaster of Paris, plastic spoon, jewelry back pin, jewelry wire (~1” piece)
Also need: Paint or drawing materials, glue
Optional materials: Clear coat spray, desired decorative elements such as googly eyes

  1. Either use air dry clay or plaster of Paris (if using plaster of Paris, be sure to mix it according to instructions on the box), mold your clay or plaster into the bowl of a plastic spoon and let it harden (preferably overnight).
  2. Once it is dry, you should be able to slide the clay or plaster right off the spoon. The mold is then ready to paint!
  3. Paint your beetle and allow time to dry. If desired, especially with tempera paint or other non-waterproof material, have an adult assist with spraying a clear coat of paint over your beetle. Allow the clear coat to dry.
  4. Decorate your beetle! Googly eyes are particularly ideal decorative elements.
  5. Attach your jewelry pin to the back of your beetle. Especially for air-dry clay, it is ideal to use some jewelry wire to secure the pin like a staple and add glue for further strength in holding the pin in place.


This SWAPS complements activities in at least one Adventure!

Recommended Adventure Tie-In:

Tiger = My Tiger Jungle

Wednesday, November 3, 2021

Fuzzy Inchworm SWAPS


Fuzzy Inchworm SWAPS


Materials: ~3” fuzzy pipe cleaner, 2 small googly eyes (sticker kind preferred), string, large safety pin (may choose to mark the bar side of the pin to distinguish from opening/spear side)


  1. Bend pipe cleaner so it has a hump in the middle to form the shape of an inchworm.

  2. Tie the fuzzy pipe cleaner to the bar (or non-opening) side of the safety pin, both near the head and near the end of the inchworm. Trim the string.

  3. Attach the googly eyes (if not using sticker googly eyes, then glue dots or regular glue can be used to attach them).

Saturday, October 2, 2021

Pet Ghost (Finger Puppet) In A Bag SWAPS


Pet Ghost (Finger Puppet) In A Bag SWAPS
“Easy care pet. No food. No water. No litter.”


Materials: cotton ball, two small googly eyes, small plastic jewelry bag, a safety pin.

Also needed: glue


  1. Carefully push a finger into the cotton ball without poking a hole all the way through. Aim to shape it like a mini ghost. If needed/desired, glue around any weak spots and/or around the top of the shaped cotton ball to hold its desired shape and allow time to dry.

  2. Glue the googly eyes and allow time to dry.

  3. When not using your ghost as a finger puppet, carefully flatten and place it inside the bag for safekeeping.

  4. Stick the safety pin through the bag to turn into a SWAPS.


This SWAPS is fun because it can be used as an actual (though small) puppet!


This SWAPS ties in wonderfully with at least one Adventure!
Recommended Adventure Tie-In:
Tiger = Tiger Theater

Thursday, September 16, 2021

Perler Tiger Scout SWAPS

 Perler Tigers Scout SWAPS Instructions:
(Perler Beads AKA Iron Beads or Fuse Beads)


Materials: Perler Pegboard (at least 12 x 14), Perler Beads (2 green, 18 black, 24 white, 46 orange, 10 blue), jewelry/wire loops (as desired), safety pin
Also needed: Glue Gun, equipment/materials to iron Perler Beads

  1. Follow the pattern below to create your Tiger Scout. 
  2. Follow instructions/method for your Perler/Fuse Beads to iron your Tiger Scout. (This step may require adult or adult assistance as needed)
  3. Use a glue gun to reinforce the diagonals that can read either as neckerchief tails or legs (glue can be faintly seen in the sample image above)
  4. Use jewelry loop(s) to attach the safety pin to the finished Tiger Scout. 


((Note: Pattern from a design found on Pinterest))


Monday, August 30, 2021

Tiger Tracker SWAPS or Den Doodle


 Tiger Tracker SWAPS or Den Doodle


Materials: 3D printed pawprint base*, twine or string, small rubber band, pony beads (listed below), and optional safety pin.


Bead Colors (can be revised as desired):

  • 3 Black: At-Home Rank Requirements Completed
    (Includes: Cyber Chip, Protect Yourself Rules, and Duty to God Adventure)

  • 1 Yellow: Bobcat Rank Completed

  • 1 White: First Elective Adventure Completed (Required Elective for Rank)

  • 5 Orange: Required Adventures Completed as Den
    (Includes: Games Tigers Play, My Tiger Jungle, Team Tiger, Tiger Bites,
    and Tigers in the Wild Adventures)

  • 1 Gold: Tiger Rank Completed

  • ⪯12 Red Orange: Elective Adventures Completed


*I designed the model for the Tiger Tracker Base in SketchUp

Scouts add the beads of the appropriate color to their Tracker as they complete requirements for Rank and additional Tiger Adventures during the year. The idea for this tracker is based on an early tradition in Tiger Scouts where they received beads rather than the Adventures/Belt Loops they earn in the current Tiger Scout program.

Note that the At-Home vs. Den Requirements are based on what is scheduled in my Den and you can change or revise the colors to match how your Den completes requirements.


I allowed my Tigers to vote on whether they wanted to keep their Tracker themselves, with the option to wear it on their neckerchief or as a temporary patch on their uniform, OR if they wanted to have their trackers displayed with their Den Flag as a Den Doodle.


This SWAPS can be a great tie-in for the first meeting at the beginning of the year, particularly if you are working on an Adventure like Team Tiger which focuses on being a Tiger Scout.


Recommended Adventure Tie-In:


Tiger = Team Tiger Adventure, Earning Your Stripes Adventure, or Rank Requirements


Thursday, August 5, 2021

Soda Cap Boat SWAPS


Mini Boat SWAPS

Materials: Plastic bottle cap, string, toothpick/dowel/or wooden skewer, scrap paper, safety pin
Also needed: Glue and/or hot glue, scissors

Optional: decorations for ship and/or paint 


  1. Take a recycled bottle cap and hot glue string in a loop to be able to attach a safety pin to the boat when not in use.

  2. Trim a stick, dowel, skewer, or toothpick to the desired size for your mast (Be careful that a mast too tall will make the mini ship top-heavy). Hot glue the dowel, skewer, or toothpick for the mast of your ship to the center of the bottle cap.

  3. Use scrap paper to cut a sail. Paint, color, or decorate the sail as you desire.

  4. Punch holes into the sail and slide onto the mast. You can style your sail and ship however you choose.

  5. Decorate the mini ship as desired.

  6. Attach a safety pin on your string loop or have fun floating your mini ship!


Ideally, you should be able to float your mini ship in the water (leave the safety pin off as needed)! 

This SWAPS ties in wonderfully with the annual tradition of the Raingutter Regatta! For young scouts, this one may require the assistance of an adult partner if they need hot glue, but can easily be done on their own. Additionally, I know at least one Adventure where it can be a great tie-in craft!
Recommended Adventure Tie-In:
Tiger = Floats and Boats

Mini Kite SWAPS


Mini Kite SWAPS

Materials: cardstock or colored paper, two toothpicks, a piece of ribbon or string (curling ribbon is a favorite), a safety pin.
Also needed: glue and drawing materials (crayons, pencils, or markers)

  1. Cut out a diamond on your paper to make the kite, ideally, the long side is ~2 inches or the length of your toothpicks.
  2. Color your paper, if desired.
  3. Glue the toothpicks in a lowercase t-shape onto one side of the paper to make the frame of your mini kite. You may cut the crossing toothpick in half to glue it flat on the paper.
  4. Trim toothpicks as needed.
  5. Trim or curl the ribbon of your choice and glue it to the bottom of the kite for a tail.
  6. Punch the safety pin through kite paper and pin. 

This SWAPS lends well to scout-themed designs if desired.

Saturday, July 24, 2021

Coffee Filter Butterfly SWAPS


Coffee Filter Butterfly SWAPS Instructions:

Materials: black pipe cleaner (already folded in half), coffee filter, string, safety pin
Also needed: non-permanent markers

  1. Flatten out your coffee filter. Use non-permanent markers to draw or scribble on the coffee filter.
  2. Place the filter on a baking sheet and spray or sprinkle water on the coffee filter to let the colors spread in a watercolor effect. Leave the filter to dry.
  3. Pinch together the filter about ⅓ from the bottom. 
  4. String the loop of the safety pin through the thread and tie the pinched coffee filter so you have a lopsided bowtie held sideways. Trim the extra string.
  5. Pinch the tied coffee filter together from the top to bottom, forming the wings of the butterfly.
  6. Fold the black pipe cleaner in half and slide, like a clip, from the center bottom up the middle of the coffee filter so the pipe cleaner makes the body of the butterfly. 
  7. Twist the pipe cleaner to form the head and also tie the butterfly together.
  8. Curl the remainder of the two strings of pipe cleaner to form the antenna of the butterfly.

Pictures of how I pinched the filter to form the wings:


Word and Feather SWAPS


 Word and Feather SWAPS Instructions: (AKA: Name and Feather SWAPS Alternative!)

Materials: Alphabet beads spelling word, 6" sparkly pipe cleaner,  2 feathers, 2 ribbons 4" long, pony beads (1 black or brown, 6 colored), 24" hemp cord, a safety pin

  1. Lay down two feathers on top of each other, lay ribbon (if pointed side on the ribbon, face point toward quill tip), and lay pipe cleaner on top with all items lined up at the end of the quill. 
  2. Hold your stack tight and (quill side) push everything through the black pony bead.
  3. Thread the safety pin through your hemp cord and tie it in the middle of the cord. Tie a second knot if desired.
  4. Tie hemp cord around the bundle, right under the black pony bead. The safety pin should now be secured under the black bead.
  5. String, thread, or loop three colored beads through both strands of hemp cord as desired, followed by the word beads, followed by three more colored beads. On the last bead, if stringing beads, loop cords around the bead and string again! You can use any method you prefer to string the beads and word onto your bundle.
  6. Tie a knot in cords.
  7. Twist or bend the pipe cleaner into a fun shape, spiral, or zigzag. 
  8. If desired, put glue inside the black pony bead to secure items.

This SWAPS is an excellent one to tie into Scouting/Rank color themes. For example, in my samples above, I used colors of:

  • gold/tan, blue, and yellow for Lions!
  • orange, black, and blue for Tigers!

Lion Face SWAPS


Lion Face SWAPS Instructions:
Materials: Wood disk, two small googly eyes, felt in tan and black, yarn in yellow or orange Also needed: pencil/pen/marker, glue, scissors, hot glue with adult supervision (optional)
  1. Glue your googly eyes on the wooden disk for a lion's face.
  2. Cut out two ears from the tan felt and a nose from the black felt.
  3. Glue your ears and nose to the wooden disk and allow time to dry. You may choose to glue your ears sticking up from the back of the disk.
  4. Draw the mouth and whiskers on your lion's face.
  5. Cut a 12” piece of yarn and set it aside.
  6. Wrap the remaining yarn around 4 fingers, be sure not to wrap too tight which can hurt your fingers and be harder for the finished yarn bundle to slide off. Wrap it all around!
  7. Take the piece of yarn you set aside and push it through the middle between your fingers (get some help or use a tool like a toothpick to help, if needed.
  8. Wrap the piece of yarn around through the tips of the fingers and tie a knot with assistance as needed.
  9. Slide the yarn off your fingers and tighten/secure the knot as needed.
  10. Glue the mane to the back of your lion's face.
Visual Guide for making mane from adventuresofadiymom.com:


While I chose another Lion-face craft for my Lions to do, this craft is grrrrr-eat alternative!
It can truly fit in anywhere during the year.
Additionally, I know at least one Adventure where it can be a great tie-in craft!
Recommended Adventure Tie-In: Lion = Rumble in the Jungle (focus on animals)

Thursday, June 3, 2021

Mini Scout Neckerchief SWAPS


Materials: 3” square of fabric (can be a piece of a full-size bandana), pony bead, safety pin

  1. Fold the square in half, to form a triangle. Roll or fold from the long edge over several times, just like folding a scout neckerchief.
  2. Fold edges over to resemble a worn neckerchief. 
  3. Slip bony bead through ends like a neckerchief slide (secure with glue, if desired).
  4. Add a safety pin to the top of the neckerchief.

This SWAPS can be a great tie-in for discussing uniforms and the neckerchief near the beginning of the year, or cross over ceremonies when scouts are getting their new neckerchief for their new rank year.
Additionally, there can be Adventures related to team building or the rank color that can also apply to crafting this SWAPS!

Recommended Adventure Tie-In:

Tiger = Team Tiger Adventure, Earning Your Stripes Adventure, or Rank Requirements

Thursday, May 20, 2021

Marshmallow Stick SWAPS


 Marshmallow Stick SWAPS Instructions:

Materials: white pony bead, bobby pin, safety pin, glue/hot glue (optional)

  1. Slide the bobby pin through the loop of the safety pin so the loop is in the eye of the bobby pin (careful not to let the safety pin slide back off until the bead is secure).
  2. Push the pony bead over the ball-tipped ends of the bobby pin, you may need to squeeze the ends together to slide it on.
  3. Put some glue or hot glue inside the bead and allow it to dry (this step may be optional if your pony bead fits securely on the bobby pin).


Tuesday, May 18, 2021

Artwork/Trading Card SWAPS


Lion Sailor Scout  Art by Me (Elaine Eigel)

Artwork/Trading Card SWAPS Instructions:

Materials: Paper (copy, drawing, colored, etc), lamination/contact paper/shipping tape, safety pin
Also: Pencil/pen/markers and/or crayons (really any art medium), scissors

Optional: Labels for the back of your trading card (https://tinyurl.com/5ep9jyjp), thread and needle, other art supplies/crafting materials for embellishment.

  1. Draw your artwork on your chosen paper (may be a cut-shaped paper).
  2. Add your signature or label on the back.
  3. Seal your artwork inside lamination/contact paper. 
  4. Cut excess lamination/contact paper away. If desired, you can leave a border edge (or extra space) that you can pierce the safety pin into without damaging the art.
  5. If desired, you can glue/attach embellishments on top of the laminated artwork.
  6. Either stick the safety pin directly through the laminate for pinning or sew a thread through the laminate and attach a safety pin by a tied loop to the artwork.

This is a great one to be creative on. You can use any flat, small surfaces such as cardboard thread/embroidery cards or cutouts of cereal boxes, etc, and then seal them in lamination or contact paper. 

Note possibilities of making scrapbook-style themed to year (Lion on my example)

Be mindful of the size. I personally recommend trading card size or smaller (2.5 x 3.5”)

Lamination can also be applied to mini collage works or even favorite small art prints as SWAPS. There are all kinds of things you can laminate and turn into a swap!
Just be clear on artwork that you did not create that you do not take credit for that artwork.

Some contact paper types can start peeling away at the edges before very long, so I recommend ironing the trimmed and finished art on a low setting with your art sandwiched between layers of paper towels or scrap ironable fabric (protect your ironing table and iron from adhesive residue).
Alternatively, you can use other lamination paper or clear packaging tape instead!


This SWAPS can also be a great tie-in for Adventures related to making artwork!

Recommended Adventure Tie-In:

Tiger = Stories in Shapes


Thursday, April 15, 2021

Some Notes About SWAPS


SWAPS of all types!

While handicrafts are the common way to accumulate SWAPS, it is perfectly acceptable to also display buttons, large beads, or turn other small inexpensive trinkets into SWAPS.

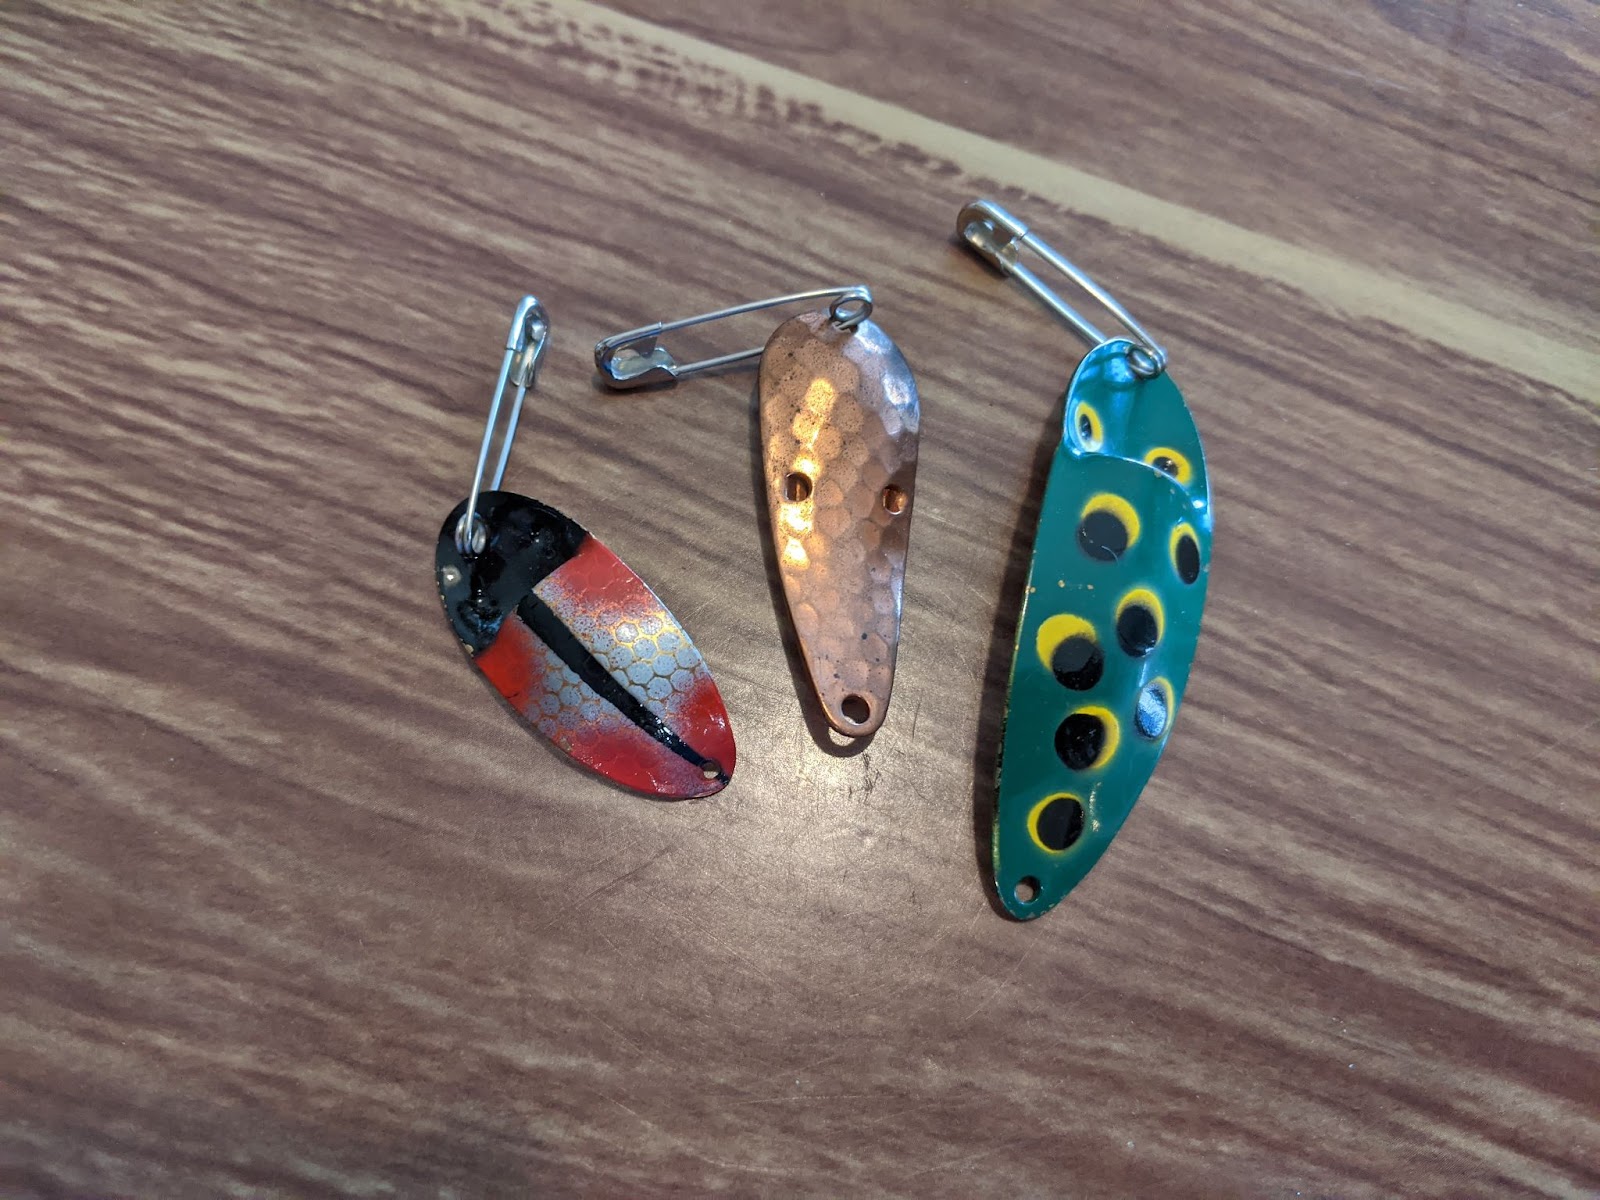
You can also easily add some sparkle, stickers, or paint to items like fishing lures or bottle caps for unique, simple SWAPS. It is always ideal to keep SWAPS inexpensive.

Do remember to avoid anything too sharp or any breakable materials like glass when crafting or putting together your SWAPS! Also, be mindful of size. Anything too heavy or big to easily wear as a pin may need to be reconsidered. SWAPS should be safe and easily portable.

Another great practice for SWAPS is to make multiples or copies of handicrafts you enjoy.
For my son, he loves turning perler (fuse beads) designs into SWAPS and will sometimes make copies of a design he especially likes, making them particularly tradable since he has a few!
This can also be something to be mindful of when trading SWAPS, in that, you may be able to replace SWAPS you made and traded away with new ones! 

Pinterest or Google Searches can be a great place to find ideas, you can search things like “smaller perler bead patterns” or “scout swaps” or “mini crafts” for all sorts of inspiration!


SWAPS: Keepers vs Tradables?

While the idea behind SWAPS can be a something to “Shared With A Pal” or “Special Whatchamacallits Affectionately Pinned Somewhere” or even just tokens of friendship to SWAP with a friend, it is very understandable that Scouts will make or receive some they wish to keep.

In the spirit of encouraging displaying both keepers and swappers, as it were, I recommend having specific zones for each type, should you have some of both on your hat, bag, vest, lanyard, or wherever you wear your SWAPS!

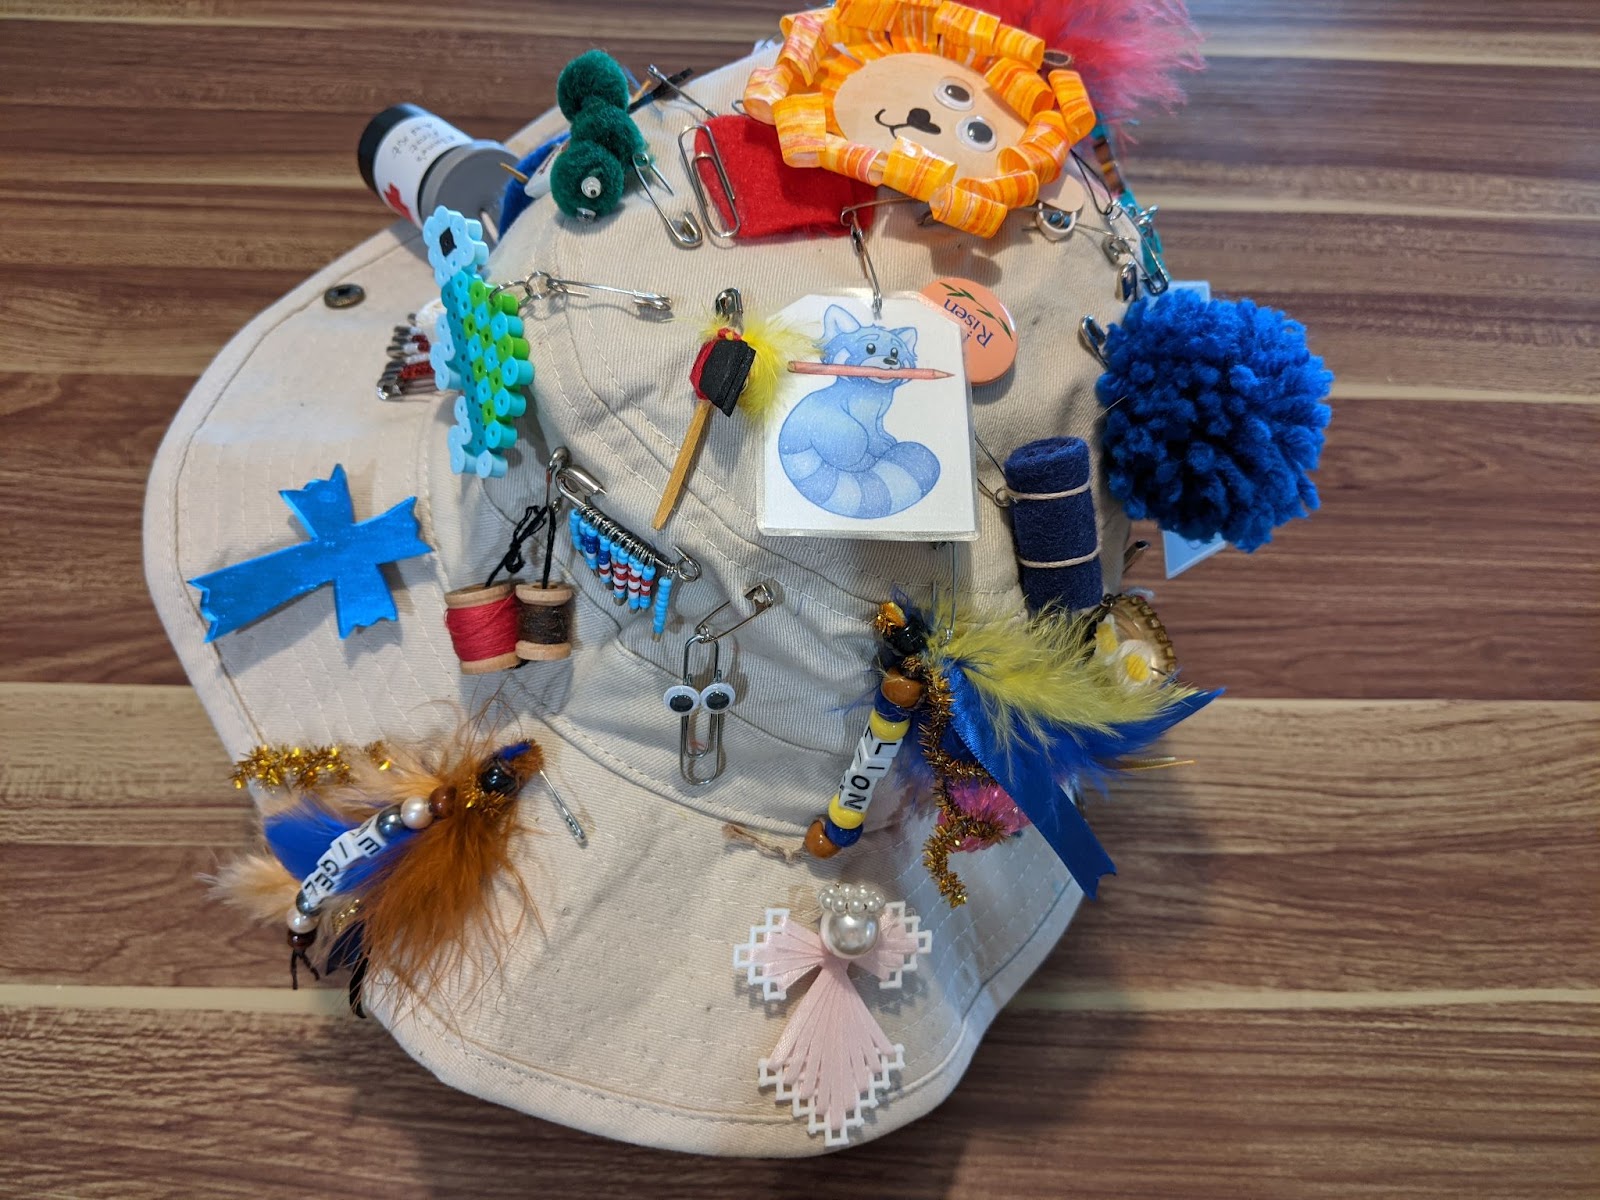
For example: I wear my SWAPS on a bucket hat. I put my keepers (usually these have sentimental value to me) on the brim of my bucket hat and place all my potential swappable SWAPS on the band or crown areas of the hat!

For you, depending how you display your SWAPS, this may mean having each type on a different strap or side. Something easily able to explain to a friend.

Also, some scouts prefer to only wear/display your keeper SWAPS and carry tradable SWAPS in a bag or box entirely separately. Whatever works for you!

Remember to explain and/or ask before an exchange of SWAPS so you know which SWAPS you and your friend can trade! And speaking of trading:

Code of Conduct for SWAPS Exchange
(AKA Good Social Etiquette Skills to Practice!)

  • If you have Keepers as well as Swappers, be kind when explaining which you are willing to trade. You shouldn't refuse an offer to trade if you have SWAPS available to trade.

  • Use the Golden Rule and treat the others like you would want to be treated. Trading should be a fun experience for both members of the SWAPS exchange.

  • Say a heartfelt “thank you” when you receive SWAPS.

  • Never say anything negative about SWAPS you receive.

  • When passing SWAPS, make sure the pins are closed so that no one gets stuck.

  • Don’t pin your SWAPS onto another person. Allow them or their adult partner to do that.

  • Remember SWAPS are intended to change hands! Someone who receives your SWAPS may end up trading them to someone else and vice versa!

  • If you see someone with few pins or nothing to trade, remember that you can always offer to simply give them a SWAPS. An Act of Kindness is always welcome!

Couple Last Tips on Exchanges!

If you are going to an event that you know will have SWAPS exchanging or you would like to pass out SWAPS while you are there, plan ahead! You can do your best to make sure you have time to have one for every participant (and staff member, if applicable).

SWAPS also do not have to be exchanged in person! If you have a pen pal or even just want to mail a friend a SWAPS or two, go for it!

Thursday, April 1, 2021

Cupcake Liner Lion Face SWAPS


Cupcake Liner Lion Face SWAPS Instructions:

Materials: cupcake liner, construction paper (tan or yellow tint/shade), 2 googly eyes, string (~6-8"), safety pin
Also needed: pencil/pen/markers and/or crayons, glue, scissors

  1. Trace two circles of ~5 cm diameter on the construction paper for the front and back of the lion head. 
  2. Cut out the circles, and cut out ears of the desired shape from the remaining paper.
  3. Glue on the googly eyes to one of the circles that will be the lion face (I like to use the untraced side of the paper for the face).
  4. Draw the rest of the face of your lion on the circle with the googly eyes. 
  5. Color your cupcake liner with shades of yellow, orange, and/or gold for the lion's mane (or use a colored cupcake liner of the desired color).
  6. Cut slits into the cupcake liner, going to the circle center fold intended for the base of the cupcake. 
  7. If desired, curl the strips of paper made from your slits either by hand or around a pen, pencil, or marker to form curls.
  8. Glue the face onto one side of your cupcake liner center (if you curl your mane, have the face on the side with curls).
  9. Glue ears onto your lion face in the desired location.
  10. String the safety pin through the thread and tie the ends to make a loop. Trim excess thread as needed.
  11. Glue the knot on the circle that will be the back of the head. 
  12. Glue the back of the head so the knot of the string is sandwiched between the back of the cupcake liner and the back of the head.


This craft is grrrrr-eat for Lions! It can truly fit in anywhere during the year.
Additionally, I know at least one Adventure where it can be a great tie-in craft!

Recommended Adventure Tie-In:

Lion = Rumble in the Jungle (focus on animals)

Wednesday, March 24, 2021

Bubble Wand SWAPS


Bubble Wand SWAPS Instructions:

Materials: 4-inch pipe cleaner, 5 Perler (AKA fuse beads or iron beads) beads, a safety pin

  1. Make a loop with roughly ⅔ of the pipe cleaner and twist it around the handle, making a bubble wand shape.
  2. Slide the Perler beads onto the pipe cleaner, ideally covering the joining twist of the pipe cleaner with at least one bead. You will need extra pipe cleaner on the end to bend over the safety pin, so if you need to use less than the five beads suggested to have enough pipe cleaner to bend, do not worry! 
  3. Slide the loop of the safety pin through the pipe cleaner. 
  4. Bend the last bit of pipe cleaner back and twist enough to keep the safety pin in place.


This SWAPS ties in nicely with bubble activities with your Den or Pack as the wand can actually be used to make small bubbles!

Additionally, I know at least one Adventure where it can be a great tie-in craft!


Recommended Adventure Tie-In:

Lion = Build It Up, Knock It Down Adventure (Outing Bubble Play)

Perler Lion Scout SWAPS


Perler Lion Scout SWAPS Instructions:
(Perler Beads AKA Iron Beads or Fuse Beads)

Materials: Perler Pegboard (at least 10 x 14), Perler Beads (6 black, 8 blue, 18 white, 24 brown, 52 yellow), jewelry/wire loops (2-3 or as desired), safety pin
Also needed: Glue Gun, equipment/materials to iron Perler Beads

  1. Follow the pattern below to create your Lion Scout.
  2. Follow instructions/method for your Perler/Fuse Beads to iron your Lion Scout. (This step may require adult or adult assistance as needed)
  3. Use a glue gun to reinforce the diagonals that can read either as neckerchief tails or legs (glue can be faintly seen in the sample image above).
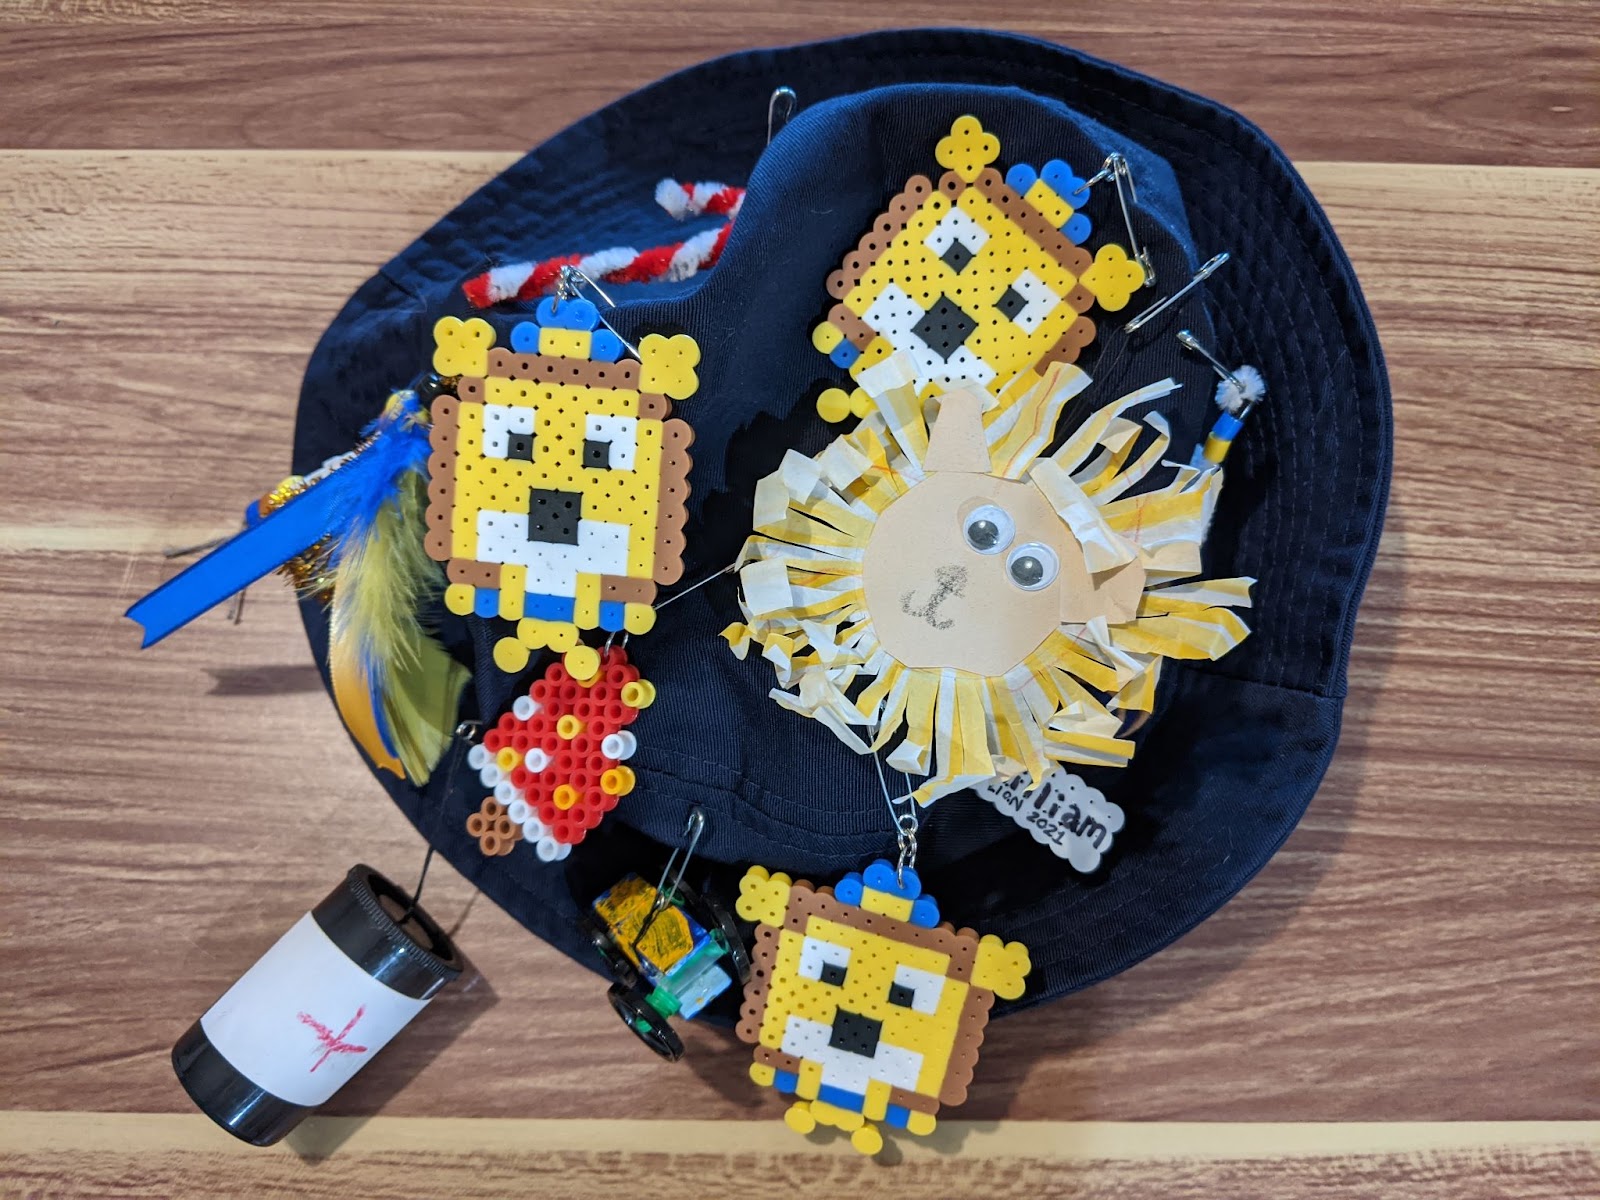
  4. Use jewelry loops to attach the safety pin to the finished Lion Scout. I used a jump ring to puncture and loop through one of the top melted beads, then used a smaller split ring to attach the safety pin to the jump ring.


((Note: Pattern from a design found on Pinterest))

Note that, as in the sample picture, it is very easy to make little variations on this design to be unique.

Perler designs are probably something I will come back to, and they are an excellent option for a scout to make many copies of a favorite design (either from a pattern or a unique design) that can be perfect for trading!

Clothespin Car SWAPS


Clothespin Car SWAPS Instructions:

Materials: (mini) wooden clothespin, 2 twist ties, 4 matching buttons, 2 pieces of drinking straw (1/2” for mini clothespin), thread (~4”), safety pin
Also needed: scissors, glue or glue gun, and paint/decorations

  1. Paint and decorate clothespin as desired. Allow to dry.
  2. Insert one of the twist ties into a hole in one button from back to front. Thread about an inch or so through a second hole and back to the other side of the button. Twist the two pieces at the back of the button tightly. Thread one of the straw pieces onto the twist tie. Thread the open end of the twist tie through a hole in the second button, then thread it back through the second hole and twist together like you did before. Trim any excess twist tie as needed. Repeat this process for the remaining pair of buttons.
  3. Thread the string through the hole in the safety pin and thread through the spring of the clothespin. Tie the safety pin to the side of your car. Trim extra string as needed.
  4. Open the clothespin and place the straw from one set of wheels in the hole of the clothespin opening. Close the clothespin. Hopefully, the clothespin will not completely flatten the straw and the twist tie should be able to turn freely inside the straw.
  5. Add a dab of white glue to the back of the clothespin near the spring. Insert the second set of wheels into the handle end of the clothespin and push it toward the spring into the glue. Allow to dry.
  6. Decorate finishing touches, such as coloring over showing twist ties, as desired.

Colors of scouting/rank, along with details such as troop number or Den number, can tie in well with this craft. You can also consider stickers, decoupage, or other decoration materials.


This SWAPS ties in wonderfully with the annual tradition of the Pinewood Derby!
For young scouts, this one may be tricky and require the assistance of an adult partner, but the results are very popular.

Additionally, I know at least one Adventure where it can be a great tie-in craft!

Recommended Adventure Tie-In:

Lion = On My Mark Adventure

Candy Cane SWAPS


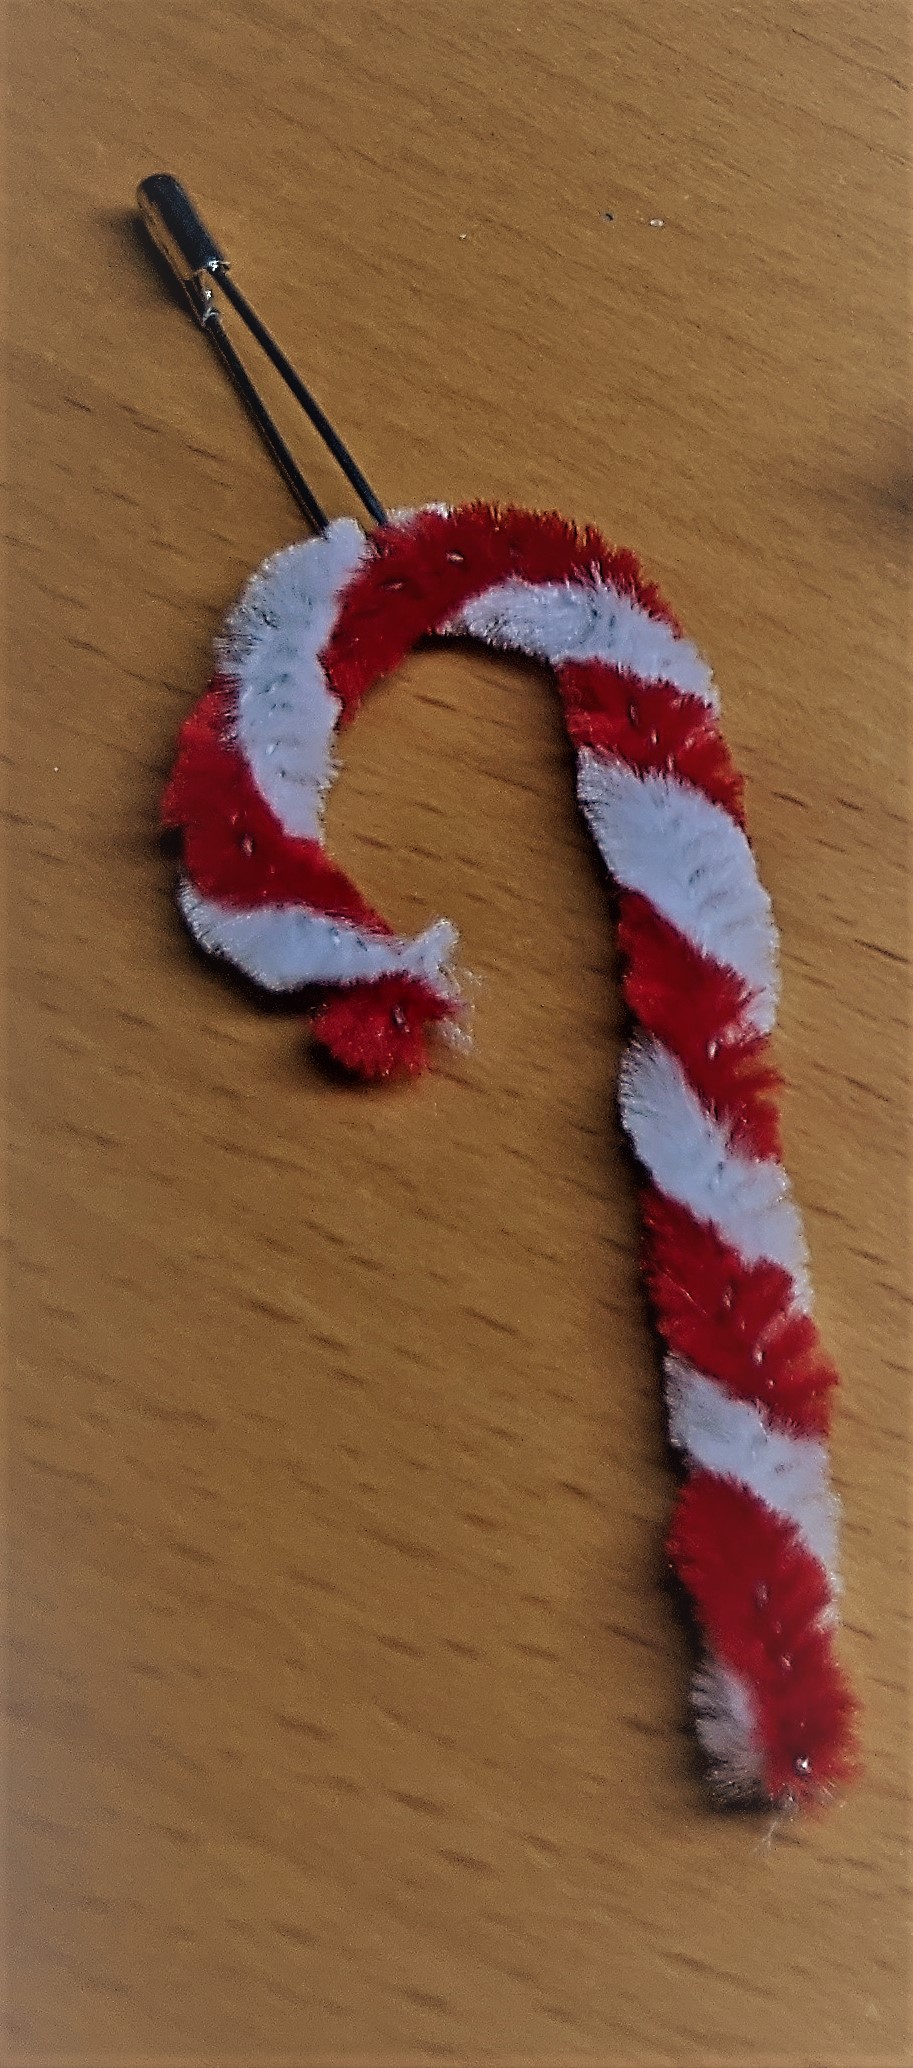
Candy Cane SWAPS Instructions:

Materials: One red and one white pipe cleaner each 4", a safety pin

  1. Begin to twist red and white pipe cleaner together. 
  2. Thread the safety pin onto one of the pipe cleaners after two twists and twist the rest of the length of the pipe cleaners together. 
  3. When done, you should be able to form a mini candy cane shape, with a safety pin near the top of the candy cane crook. 


An excellent craft to make around Christmas time!

Name and Feather SWAPS


Name and Feather SWAPS Instructions:

Materials: Alphabet beads spelling name, 6" sparkly pipe cleaner,  2 feathers, 2 ribbons 4" long, pony beads (1 black or brown, 6 colored), 24" hemp cord, a safety pin

  1. Lay down two feathers on top of each other, lay ribbon (if pointed side on the ribbon, face point toward quill tip), and lay pipe cleaner on top with all items lined up at the end of the quill. 
  2. Hold your stack tight and (quill side) push everything through the black pony bead.
  3. Thread the safety pin through your hemp cord and tie it in the middle of the cord. Tie a second knot if desired.
  4. Tie hemp cord around the bundle, right under the black pony bead. The safety pin should now be secured under the black bead.
  5. String three colored beads through both strands of hemp cord. String name on strands. String three more colored beads. On the last bead, loop cords around the bead and string again! 
  6. Tie a knot in cords.
  7. Twist or bend the pipe cleaner into a fun shape, spiral, or zigzag. 
  8. If desired, put glue inside the black pony bead to secure items.


This SWAPS is an excellent one to tie into Scouting/Rank color themes. For example, in my sample above, I used colors of gold/tan, blue, and yellow for Lions!